Monday, August 25, 2008
Railway Embankment Tutorial
Please bear with me this is my first time attempting a tutorial. Feedback/suggestions would be very much appreciated (grammar and spelling don't count).  Step 1: The first step is selecting the proper wood for the job. Personally I like to use 5mm MDF and so that is what is pictured above. The wood is thick enough that warping should not be a problem. After choosing the wood I then cut it into sections, 11.5” x 5.75”, these will form the bases for the railway embankment. There is no need to sand the wood unless you feel it necessary. In addition, you can take the time to bevel the edges of the boards; however I seldom do because I find the hard edge makes it easier to pick up and move. To combat the hard edges of the table I usually paint them a neutral color (i.e. graveyard earth).
  Step 2: Next, I cut eighteen 2” wide stripes of Styrofoam from a sheet in order to form the base of the railway embankment. I used 3 sections to reach the desired height of 1.5”; however 2-5 strips could be used in order to achieve higher or lower embankments. After the foam was cut I measured in 1” from the right-hand edge of the wooden base. The line shown above is the marker line I used to position the leading edge of the foam strips. The end result has the strips 1” from the right-hand edge and 3” from the left-hand edge.
  Step 3: In order to achieve a solid structure I used glue on the bottom of the foam and between each subsequent layer. Repeat these steps for each of the six bases. I have shown here that a staggered pattern can be used to ensure greater strength. Now is a good time to lay the sections out to ensure that the foam forms a continuous line and that there are no major height variations between the various sections. I found that I had to try several combinations before I found one that worked. Once the order of the sections has been decides I recommend numbering the upper and lower sides of the bases.
  Step 4: Although it looks like a lot of work was done from the previous step it actual requires very little effort to get to this point. For this step my focus will be on the 1” right-hand side of the bases. I work with specialized foam called “oasis” which comes in two primary forms, wet and dry. I like to work with the dry foam because it is slightly more dense and can be easily shaped with your finger or popsicle stick. To start I cut sections of foam 1.5” high x 1” wide and these I run the entire length of the base. Next I use a knife angled at approximately 45 degrees and run it thru the foam to create the steep side of the embankment. The effect achieved is used to resemble a steep impassable slope that is used to provide the illusion of height. Shown above is one of the variations that I build to break up the continuous sloping edge. A culvert is a great way to liven up the edge and draws the attention away from the otherwise boring edge. I also would include the odd tree or rocky outcrop in order to break up this side of the embankment. Don’t worry if the edges look plain, this is not designed to be the eye-catching side of the piece, in actuality you never want to draw attention to any one single feature when building terrain, flow is the key.
Wednesday, August 20, 2008
COMPLETED - FINALLY


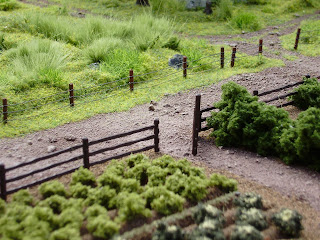
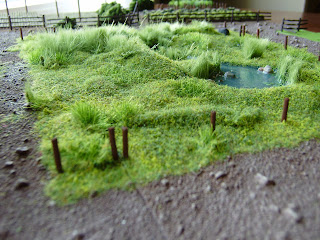
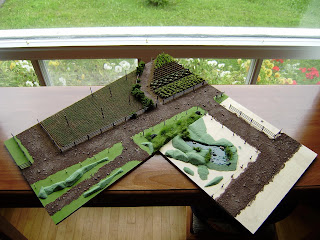
Well it took a long time and a lot of hours to finish but I did it. The photos are not my best work but I think they still speak volumes for this work of art. Write now I am too busy to type up a list of all the details so I will let you the viewer enjoy the photos for right now. I hope to write a tutorial for this piece which I know will please a lot of you guys out there. Stay tuned and give me some feedback if you like what your seeing.
Cheers,
Shawn Morris
Friday, August 15, 2008
Major Updates
Tuesday, August 12, 2008
Friday, August 1, 2008
Tuesday, July 29, 2008
Farm Terrain Tiles

Here is the first in a series of four tiles. The entire project is meant to mirror a farm style land scape. Shown here is a simple field with asparagus poles and a lavish garden. The roads are interconnecting and run throughout the four tiles. The other tiles include similar features and in the end these piece will flow seemlessly together...I hope. Enjoy and please stay tuned for more photos.
Cheers,
Shawn Morris
Subscribe to:
Comments (Atom)


.jpg)
.jpg)
.jpg)
.jpg)